Using files to add to your stocktake...
Previous Topic  Next Topic 

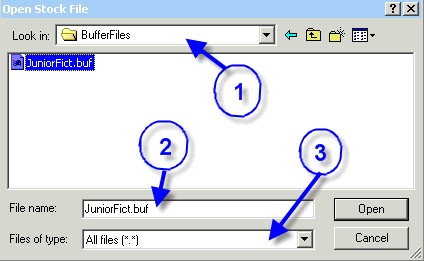
Stocktake data can be collected using a number of non-networked computers / laptops using either the Utilities / Setup / Buffer file OR by opening Notepad and scanning in the resource barcodes.  The file is then saved and added to the Stock file by using the File Append to inload the saved .txt or .buf file.


This can prove very handy when you have a number of people assisting with your stocktake.  Each person is allocated a specific area to stocktake.  Their file is saved and imported at a later date by the stocktake 'co-ordinator'.  The date and time each section is inloaded can be recorded using the Stocktake Checksheets and then you can create Reports and View each specific area.


  1. Save your files in one folder so you can find them easily. 
  2. Always call the file something descriptive ie usually the location where you collected the data
  3. When using the File Append option make sure you look for All Files.  This screen defaults to .txt files so if you created your file using the Utilities / Setup / Buffer file option the file will be a .buf format and it will not appear on this list until you change to All Files


Setting up a Laptop to collect Stocktake Data -


Using a Laptop to create a text file.  This will allow you to scan in the barcodes (a Barcode Scanner with a USB connection will be needed) and then add this file to your stocktske on the main library computer.

    1. Connect your barcode scanner to the laptop
    2. Create a folder on the C:\ or D:\ called Stocktake and have a USB memory stick handy
    3. Open up Notepad by clicking on START / Accessories / Notepad
    4. Scan in the barcodes for a particular area eg Junior Fiction A - L (Get some kind of sequence going)
    5. Once you have finished scanning the barcodes for this area click on FILE / SAVE AS and save the file to the Stocktake folder as a text file.  Name the file so you know what it is eg JF20101207A-L.TXT
    6. When the file has been saved to the hard drive save it again, this time to the USB drive
    7. Take the US?B stick to the main library computer and open up Circulation / Stocktake / File Append.  Locate the USB drive and the relevant file and click Open.  If you can't find it on your drive click the drop down arrow in the Files of Type field and select ALL FILES.
    8. Now click the Append button and you will be given confirmation of how many barcodes have been added.
    9. Proceed with the stocktake as per the Stocktake Instruction Check Sheet


- - - - - - - - - - - - - - - - - - - - - - - - - - - - - - - - - - - - - - - - - - - - - - - -


Stocktake Related Instructions (General Stocktake Page)


  1. Step by Step guide to doing a stocktake
  2. Stocktaking Tips & Warnings
  3. Cleaning up data for a stocktake
  4. Using the stocktake Checksheet (If you want to edit the details you can Download DOC)
  5. How to Start a new stocktake
  6. Setting Stocktake Parameters
  7. Adding barcodes to your Stocktake
  8. Stocktake Using a Memory Scanner
  9. Using files to add your to stocktake
  10. Exporting your stocktake data
  11. View your stocktake
  12. Stocktake Reports
  13. Reconciling your Stocktake
  14. Marking items as Missing
  15. Writing resources off that have been missing a long time