Exporting your Stocktake Data
Previous Topic  Next Topic 

If you have set up a stand alone computer or laptop to do your stocktake, but your main database is on the Server (or main library computer) you can collect stocktake data, export the data in a text file format and then append it to the stocktake on the Server or main library computer.


This comes in handy if your school does not have a portable barcode scanner as you can take the computer/laptop to the actual location of the resources and scan in the barcodes.  You can also view and generate reports to screen (as long as you have some sort of printing device installed, no printer installed at all = no can even view reports! Give us a call if you're not sure).


To export the stocktake data -
  1. Load Circulation / Stocktake / Export
  2. Click on the Export button
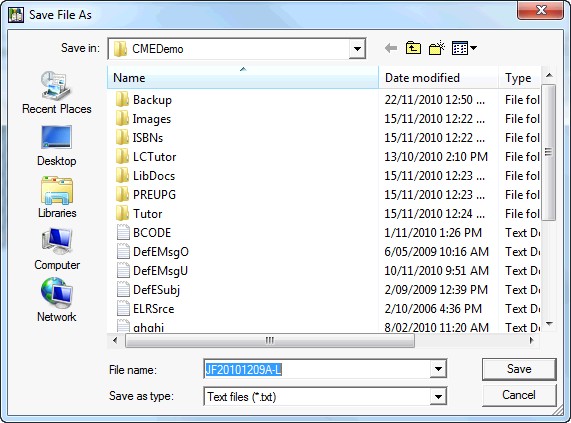
  3. A browser pop up will appear and defaults to the CMEPlus folder (CMEDemo in the example below)
  4. You will need to select the destination drive you would like to save the .txt file to


  1. A confirmation screen will pop-up so you know when it's done


This file can be used to inload barcodes into any LibCode stocktake.


- - - - - - - - - - - - - - - - - - - - - - - - - - - - - - - - - - - - - - - - - - - - - - - -


Stocktake Related Instructions (General Stocktake Page)


  1. Step by Step guide to doing a stocktake
  2. Stocktaking Tips & Warnings
  3. Cleaning up data for a stocktake
  4. Using the stocktake Checksheet (If you want to edit the details you can Download DOC)
  5. How to Start a new stocktake
  6. Setting Stocktake Parameters
  7. Adding barcodes to your Stocktake
  8. Stocktake Using a Memory Scanner
  9. Using files to add your to stocktake
  10. Exporting your stocktake data
  11. View your stocktake
  12. Stocktake Reports
  13. Reconciling your Stocktake
  14. Marking items as Missing
  15. Writing resources off that have been missing a long time