Using the Report Generator...
Previous Topic  Next Topic 

In the Data Entry module we have included a basic Report Generator to help you produce those reports for special purposes.  All you need to do is set filters, select items (use CTRL+Click or SHIFT+DownArrow to highlight items and use the Show Sel. Only button), re-arrange and resize the columns and click the printer button


  1. Use the filter options and select the records you would like to see in the report (CTRL and SHIFT options as mentioned above... don't forget to click Show Sel Only button).  Re-arrange the columns by dragging them with your mouse and resize them as necessary
  2. Click the Print Report button


  1. The Catalogue Report Generator pops up
  2. Change the Report Title if necessary eg Shelf List of dodgy Authors
  3. Word wrap on or off (If the data in the field on a record is larger than the space you have allocated by resizing the columns, word wrap on will display all information even if it takes a few lines)
  4. Select report layout (Portrait = down the page, Landscape = across the page)
  5. Select output... use Screen/File so you get to see the report on the screen before committing it to paper (you can print from the preview screen anyway)
  6. Generate Report


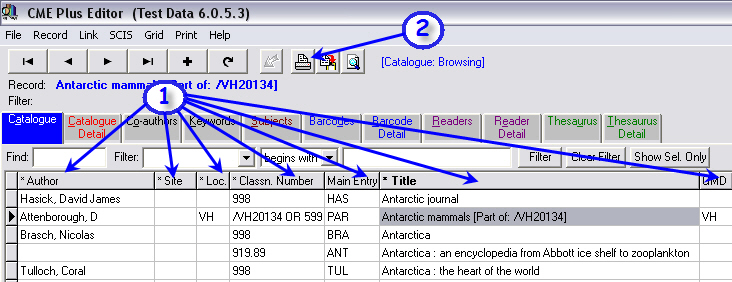
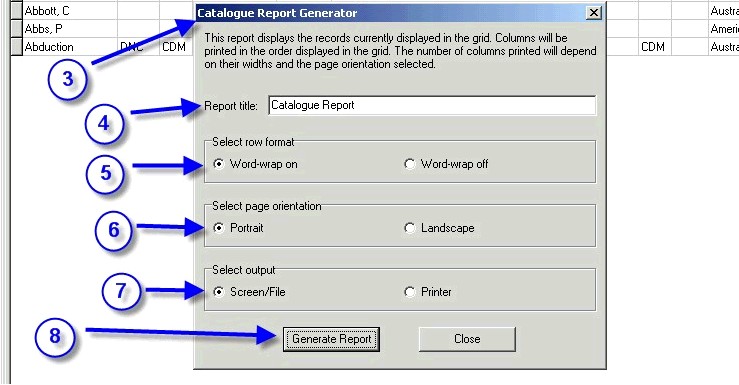
You can't actually save a report format but you can use the Grid Option on the Bar Menu to save the Grid State/Look which can be loaded at a later date and obviously a report can be quickly created by re-setting the filters, selecting and hitting the Print Report button